
When it comes to baking pies, the most important part is undoubtedly the crust. A flaky, buttery crust provides the perfect foundation for all those delicious fillings. If you've always wanted to learn how to make a pie crust from scratch, you're in luck. With a few key ingredients and some simple techniques, you'll be able to whip up flaky homemade pie crusts that will impress all your friends and family.
Pie Crust Ingredients: The Building Blocks of a Classic Crust
To make a classic pie crust, you'll need the following ingredients:
- All-purpose flour: This is the go-to flour for a classic pie crust.
- Salt: A pinch of salt enhances the flavor of the crust.
- Cold butter: Temperature is crucial when it comes to pie crusts. Using cold butter is essential to achieve a flaky texture.
- Ice water: Just like the butter, the water needs to be ice-cold to ensure the crust doesn't increase in temperature too much.
A Tried and True Classic Pie Crust Recipe
This top-rated butter pie pastry recipe is a favorite among bakers and has stood the test of time. It yields a single crust, so make sure to double the recipe if you're making a double-crust pie. Here's what you'll need:
Ingredients:
- 1 1/4 cups all-purpose flour
- 1/4 teaspoon salt
- 1/2 cup cold butter, cubed
- 3 to 4 tablespoons ice water
Directions:
Step 1: Cut the butter into the flour
The first step in making a pie crust is to whisk together the salt and flour in a large mixing bowl. Next, use a pastry blender to cut the cold butter into the flour. Work the butter into the dough until the bits are about pea-sized.
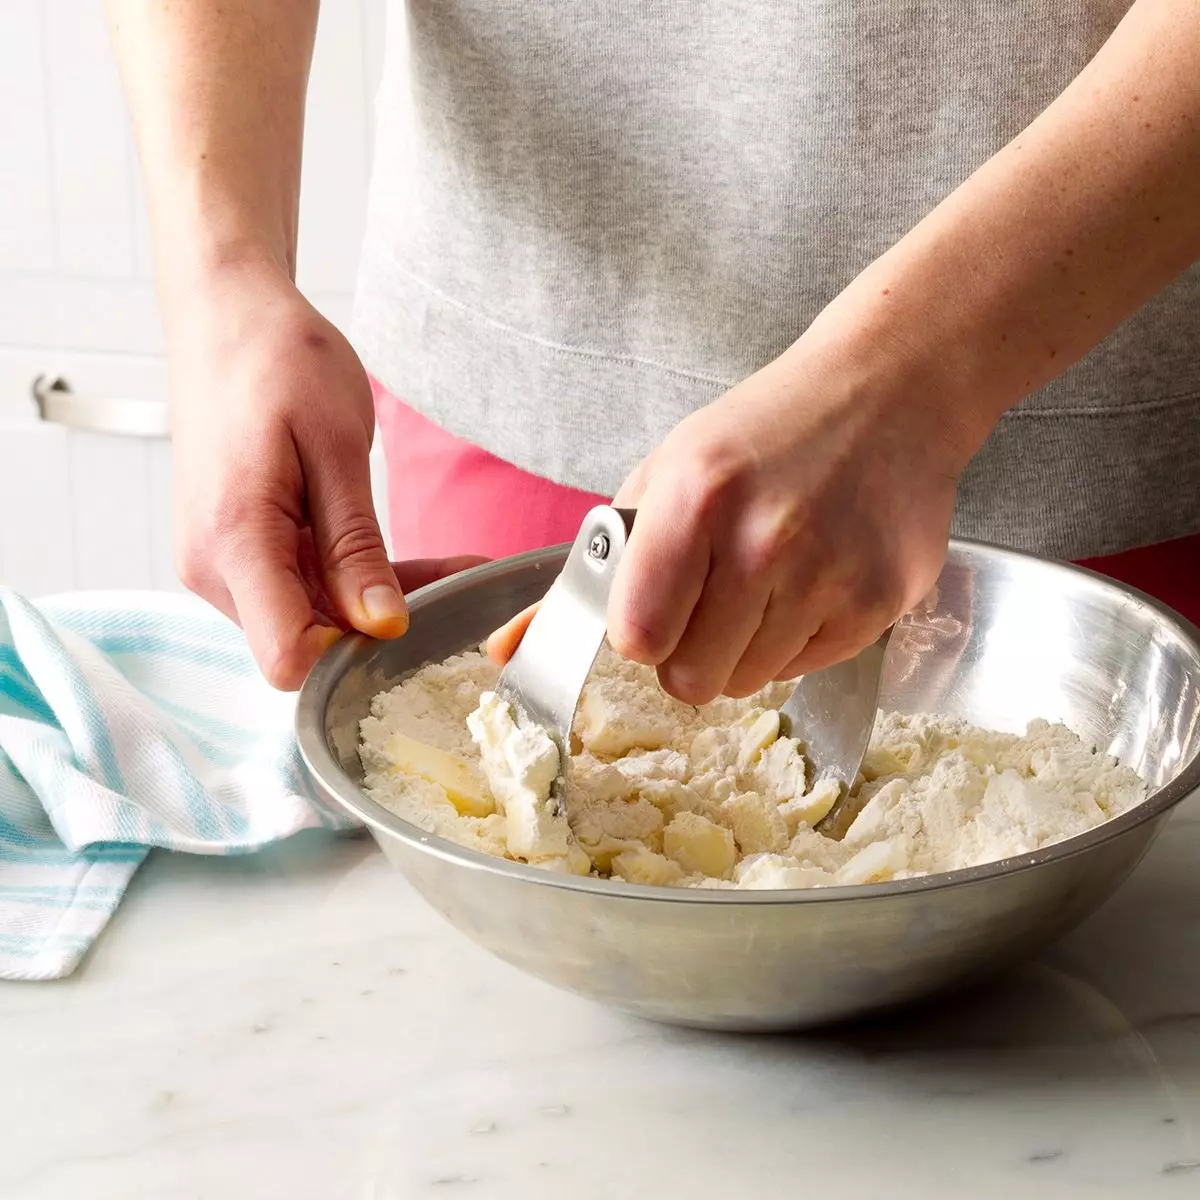 Image courtesy of TMB Studio
Step 2: Add water
Slowly add ice-cold water to your pastry mix. Start with two or three tablespoons and add more as needed. The crust is at the right consistency when it holds together when pressed. Avoid over-mixing the dough, as this can result in a tough crust.
Step 3: Chill the pie pastry
Before you proceed with your pie crust, let it chill in the fridge for at least an hour. This helps to firm up the butter and ensures a flaky crust.
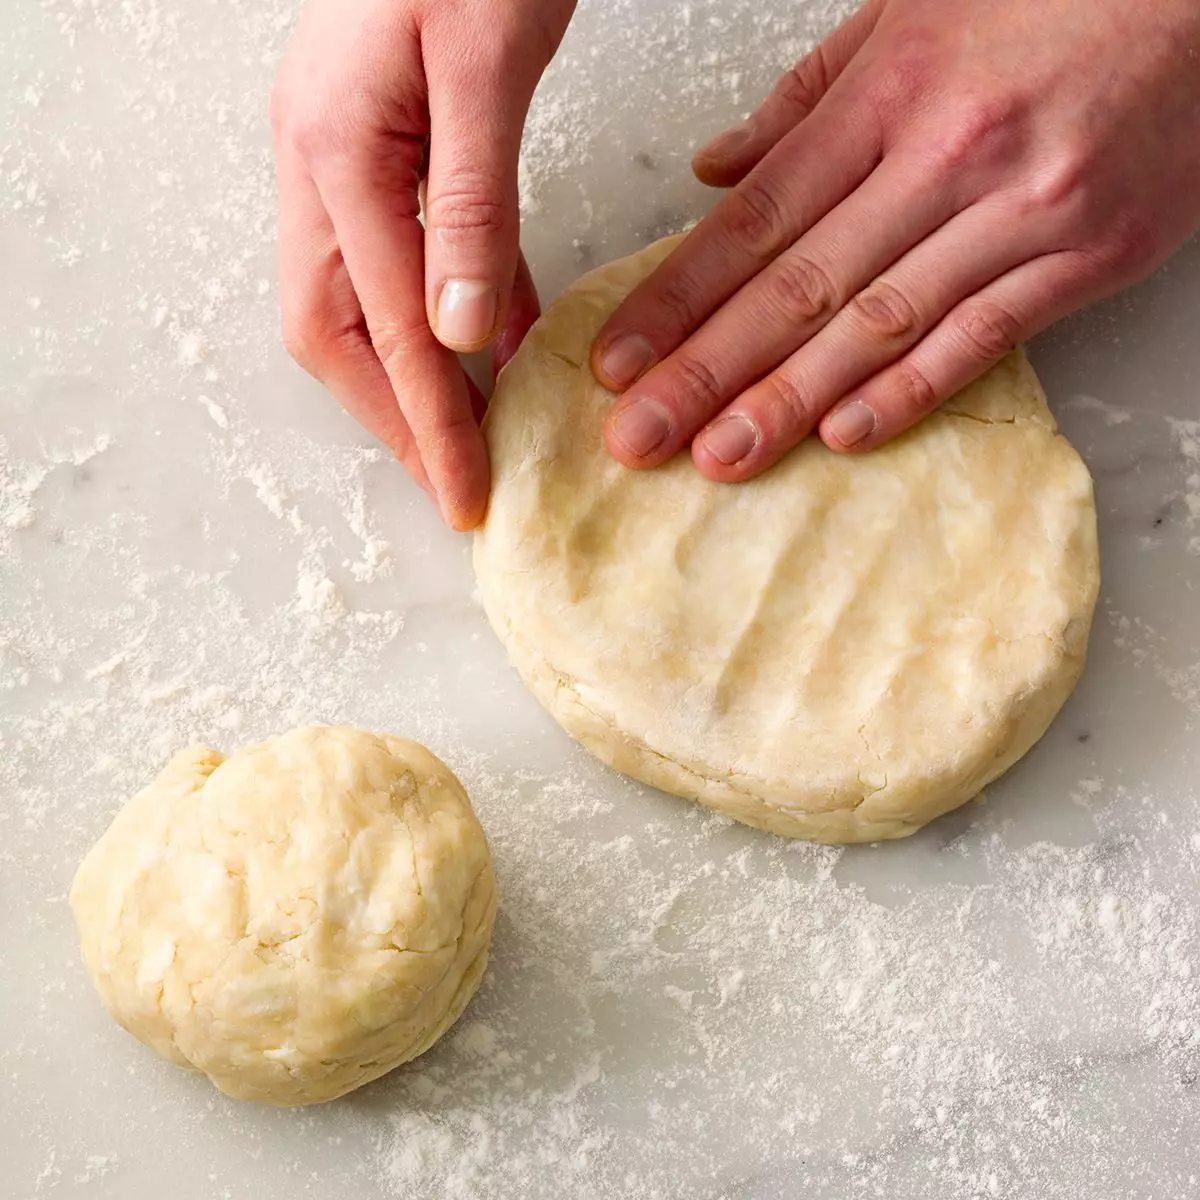 Image courtesy of Taste of Home
Step 4: Roll the pie crust
After chilling, lightly dust your work surface and rolling pin with flour. Roll the dough from the center outward, giving it a quarter turn after each roll. Aim for a thickness of about 1/8 inch, similar to two stacked quarters. Add a sprinkle of flour if necessary to prevent sticking.
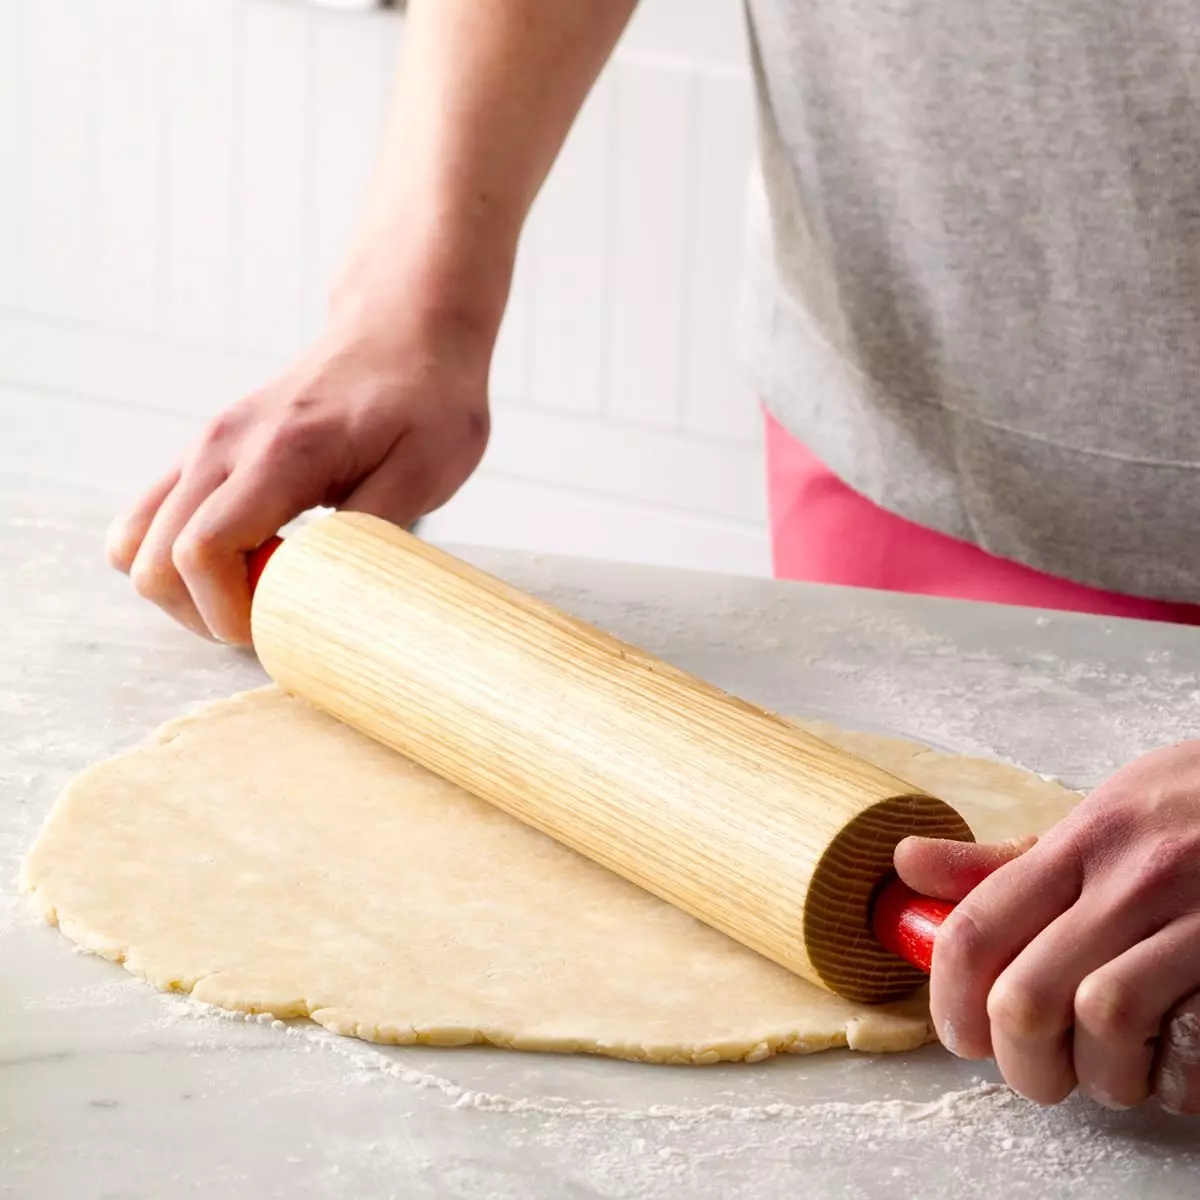 Image courtesy of TMB Studio
Step 5: Transfer the crust to your pie pan
To move the crust into the pan, drape it over the rolling pin and gently transfer it to the pan. Allow the pastry to ease into the plate and then trim the edges, leaving some excess for crimping.
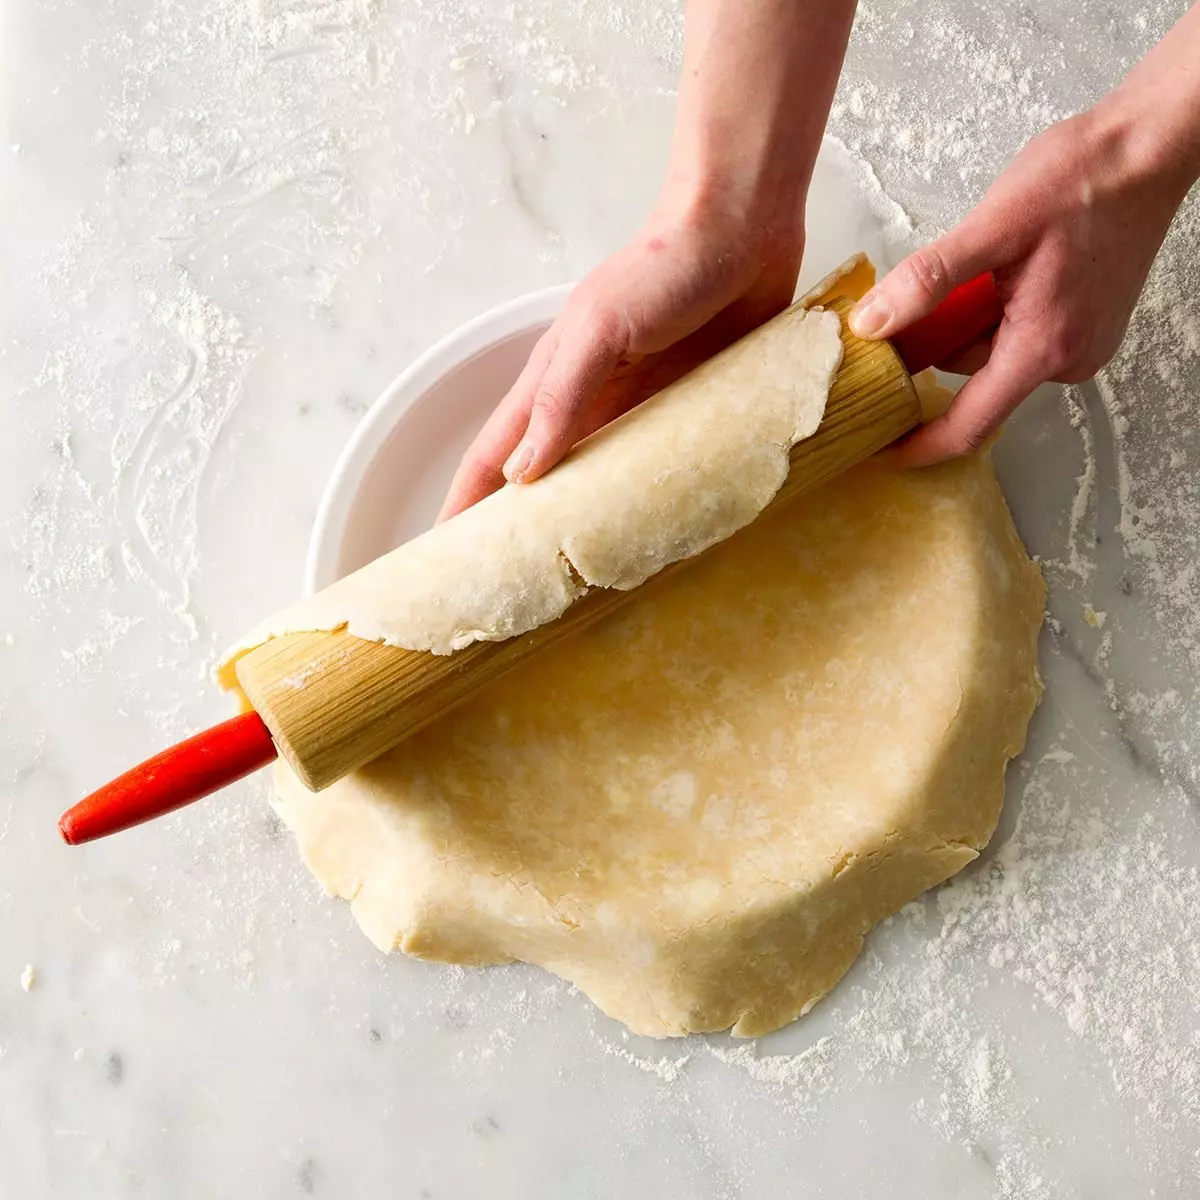 Image courtesy of TMB Studio
Step 6: Finish the edges
You can finish off your pie crust in various ways. One traditional method is pinching the pastry around the edges. Alternatively, you can create decorative edges using ropes, braids, or by making pretty impressions with a fork.
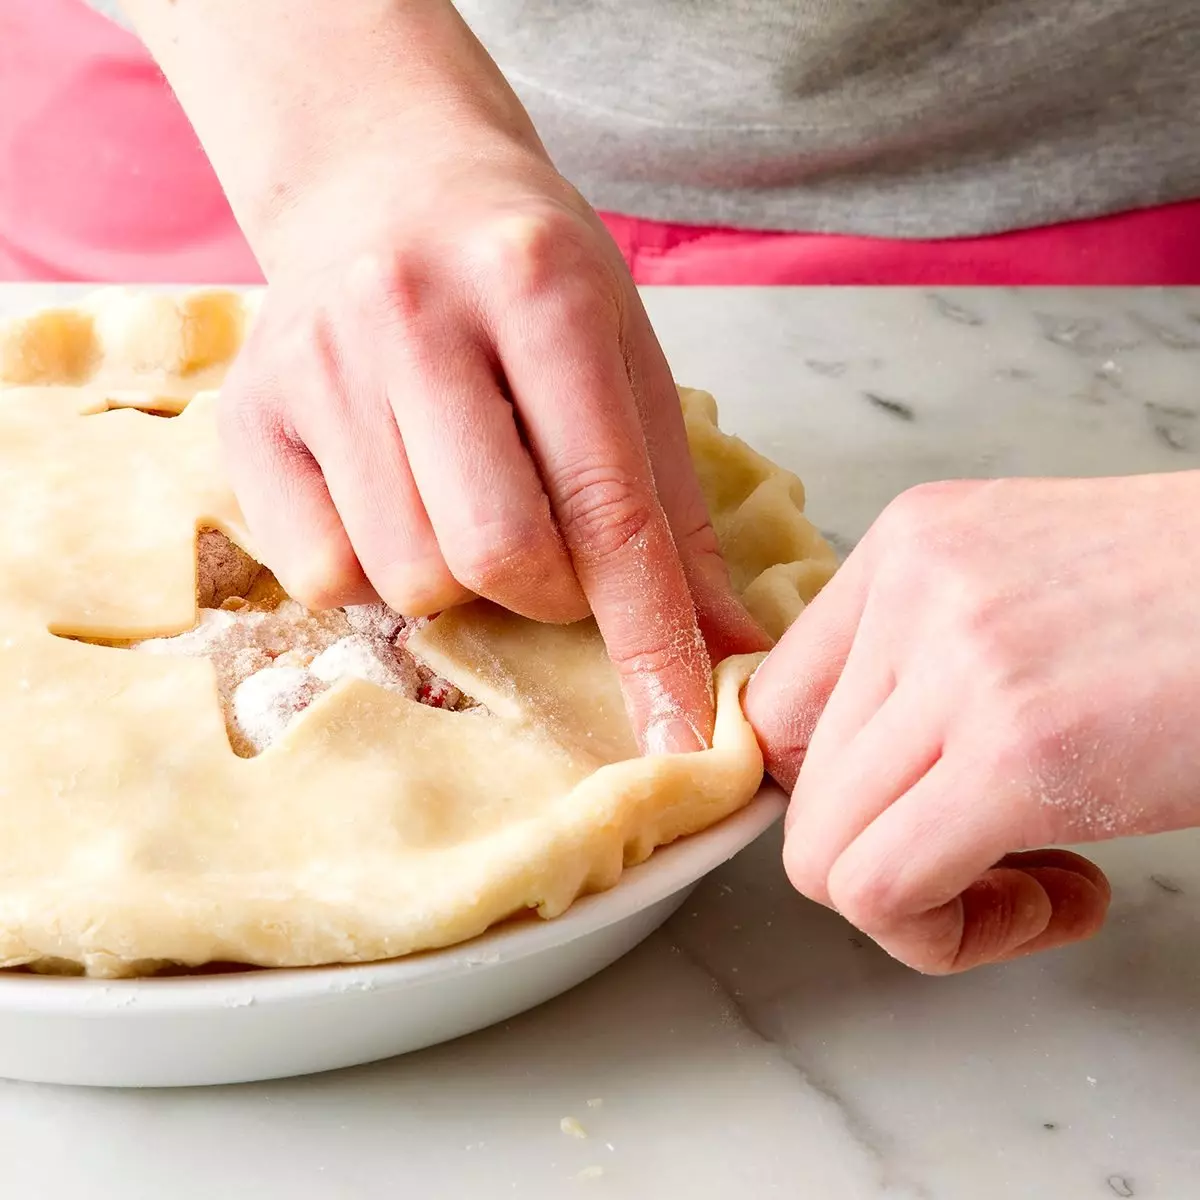 Image courtesy of Taste of Home
Once your crust is complete, it's time to bake your pie to perfection. Place it on the center rack of the oven and keep an eye on it to prevent over-browning.
Pie Crust Variations to Spark Your Creativity
If you want to take your pie crust to the next level, here are a few variations to try:
- Braided edge: Instead of a basic crimped edge, try braiding. Roll out an extra portion of pie pastry, cut it into three strips, braid them, and press them into place around the outside of the pie.
- Cutout shapes: Use small cookie cutters to create decorative shapes that can be pressed along the outside of the pie crust.
- Lattice crust: This traditional style uses overlapping strips of pastry to create a woven finish.
- Egg wash: For added shine, whisk an egg with a teaspoon of water and brush it over the crust before baking.
Storing and Tips for Perfect Pie Crusts
Once your pie dough has been chilled in a disk shape, you can store it in the refrigerator for up to three days. For longer storage, wrap the pastry tightly and seal it in a freezer-safe bag. It will last for about two months. Thaw it in the refrigerator overnight when you're ready to use it.
Frequently Asked Questions:
What if my pie crust is crumbly? If you find that your crust isn't holding together, it's okay to add more water. Start by adding a small amount at a time until the dough starts to cling together.
How do you keep pie crust from shrinking? To prevent the crust from shrinking or sliding down the sides of the pie pan, chill the crust inside the pan for about 15 minutes before baking. This will help the crust firm up and stay in place.
What makes pie crust flaky? Butter is the key to a flaky crust. While shortening and lard can be used, our Test Kitchen has found that butter creates the flakiest and tastiest crust. The cold butter creates pockets of steam during baking, resulting in those coveted flaky layers.
Do you need to blind bake pie crust? Not all pies require blind baking (baking the crust before adding the filling). It is most commonly used for cream pies or when the recipe specifically calls for it.
Can I use this pie crust recipe for pot pie? Yes, you can! Since this recipe doesn't include sugar, it works perfectly for both sweet and savory pies.
Now that you have the knowledge and steps to make a classic pie crust, it's time to get in the kitchen and start creating your own delicious homemade pies. With practice, you'll become a master pie maker, and your friends and family will be begging for your flaky, buttery crusts.


